Hello Blogger Friends and a happy Saturday to you all. This is a holiday weekend here in the USA. Our July 4th celebration is coming up on Tuesday. So enjoy whatever weekend plans you may have.
The card I am showing today is one that I made for my weekly Saturday post on the CottageCutz Blog. So let's get started on some details of how I created this card.
I have been showing you over the past several weeks how to combine word die phrases with a stamped sentiment. Check out my cards here, here, here here and here. I am continuing with this series today as well.
Today I wanted to create a baby card and use the Baby Koala w/Blanket die. I thought the Precious Phrase would work nicely along with a baby sentiment. So let's get started with some details on how I created my card.
Step 1: I started my card this week with a sketch. I liked this one because it's a square card and I thought it would fit the Koala Bear well.
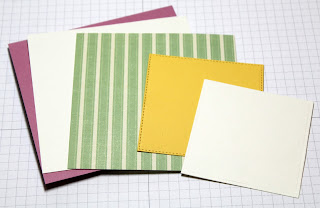
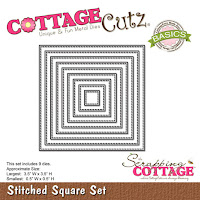
Step 2: Once the layout was decided on, I started figuring out my square card base and the additional layers. I decided to make a 4 3/4" square card. Then I picked my card colors. For the center squares I was able to use the stitched square & square set dies. I used the 2nd largest of each set.
Vanilla Layer: 4 1/2" square
Wild Wasabi Striped Designer Paper: 4 3/8" square
Daffodil Delight Center Square Layer: 3 1/8" square
Vanilla Center Square Layer: 3" square
Step 3: I cut the Koala Bear in a medium and dark brown cardstocks. Decided to use a yellow for the blanket. The ears and tummy are cut in vanilla and I shade them with cocoa ink.
Step 4: Started some partial card assembly. I hadn't cut the oval or the rectangle layers yet and I needed to determine how large to make those.
Step 5: Placed my Precious Phrase in this step. This helped in the placement of the center square. The sketch has everything evened off. I moved my image panels down slightly to accommodate the phrase.
Step 6: I decided to use the 4th largest oval from the Oval set. The Koala Bear fit nicely in that size oval.
The rectangle panel underneath the oval is cut at 1" x 3 3/4". I used a hearts embossing folder on this panel. These were both cut in the sugarplum cardstock.
The green flag is 5/8" x 4 3/8" and I cut in wild wasabi cardstock that matched the designer paper.
Step 7: Before I assembled all the center layers, I stamped my sentiment. It is a bit large and I wanted to make sure everything would fit. It also had more words than I wanted to use. So I used my MISTI and taped off the words "for a special". I inked up just "Little One".
Step 8: Almost finished. I adhered the image to the oval panel and then attached it to
the square sentiment panel.
Step 9: Assembled this panel to the card base to complete my project. I used a couple of hearts in the sugarplum shade to finish it off. There is such detail in he CottageCutz dies. Here is a close-up of the Koala Bear. Love the font on these new phrase dies as well. the square sentiment panel.
I hope I have given you some inspiration today. If you need a baby card this bear is just too sweet. And, by changing the color of the blanket you could make it for a boy or girl. Well, that's it for me for this post. Until next time........God bless.
Dies I used to create card:


No comments:
Post a Comment